Why you would choose this type:
if you don't own any vacuum cleaner bags, this is the next best option (after FFP and surgical masks obviously). Keep in mind that changing the filter is a bit fiddly and you have to be careful with crosscontamination! Also keep in mind that you should change the filter every two hours. (And you still need to wash the cover every day!)
For full disclosure: I am not sure that there is any actual scientific benefit to inserting a filter made of tissue. From what I read in the articles that I linked [here] paper towels are only able to filter out 30% of particles. Cotton fabric however filters out over 60%, so in this construction the cotton fabric probably wins out. On the other hand, the chinese government released a video on how you can manufacture your own masks from 2 layers of paper towels and 1 layer of tissue paper (watch this video if you want to know how to make them yourself). Anyway,the most important point in all of this is making sure that no air can get in around your nose!
And in all honesty, even if the tissue and paper towel combination is not perfect, a few more layers of potential filtration certainly can't hurt :)
So make the mask with our without the home made filter, but make sure you add the wire and nose pad to make it snug around your nose bridge!
You will need:
- Tightly woven cotton (20x35cm)
- Viscose (20x35cm) or something similarly soft
- Jersey (=T-shirt material) (6x10cm)
All the fabric needs to be prewashed before cutting out! Use the highest setting your washing machine will allow, just to make sure that the fabric shrinks before sewing it up
- Rotary Cutter or fabric shears
- Pins
- Marking tools
- Wire
- Wire cutter
- Fabric Tape
- Zipper foot
- Iron
- Print out of the PDF Pattern. Print at 100%, don't scale it to your paper size!!!

You will need these pattern pieces:
 |
| Cut out two pieces of your outer fabric |
 |
| Now cut the pattern piece at the dotted line - this will be your lining piece (if you want to make more masks feel free to just fold it back instead of cutting it off) |
 |
| Cut 2 pieces of your lining fabric (preferably viscose) |
 |
| Cut 1 nose pad out of jersey |
 |
| Cut the wire at the length indicated on the pattern piece |
Check if you have everything cut out:
 |
| For this mask you need lining, outer fabric, a jersey rectangle and wire |
Preparation: Prepare your nose pad like [this] and your wire like [this].
Now the sewing beginns:
 |
| Pin your pieces together with right sides facing each other |
 |
| Sew with a 1 cm seam allowance |
 |
| Clip into the seams. Make sure you don't cut through them. |
 |
| Iron your seams open, I have a little helper here, but you can totally do that without it. |
 |
| Mark a line 1 cm below the top. Use chalk or eraseable pen. |
 |
| Fold your nose pad in half and mark the middle with a pin. |
 |
| Pin in place along the line that you drew. |
 |
| Stitch in place. I used white thread so you can see the seam line, you will probably want to use a complementing colour :) |
If you are wondering why we stitched the nose pad to the lining just at the lower edge: that way it can bend towards your face and hug your nose better. Let me show you what I mean:
 |
| Here you can see even better that the nose pad bends towards my nose. The wire gives the mask the general shape, but you wouldn't want it to pinch your nose, so the stretchy nose pad is the real MVP! |
 |
| Take your lining piece to the ironing board and fold the edge over once (~7mm). Iron in place. |
 |
| Fold over again and iron in place. |
 |
| Unfortunately I forgot to take a foto of the next step, but the construction here is the same anyway. Pin the top edge with right sides together. |
 |
Back to the right colour :D Please excuse the atrocious manicure the apocalypse has got me busy with other things. The point here is to make sure that you have a gap that is 2-2.5 cm wide (it will depend on how precise you cut your fabric in the beginning - but as long as it's 2 cm or wider it's of no consequence)
Stich the top edge with a 1cm seam allowance. |
 |
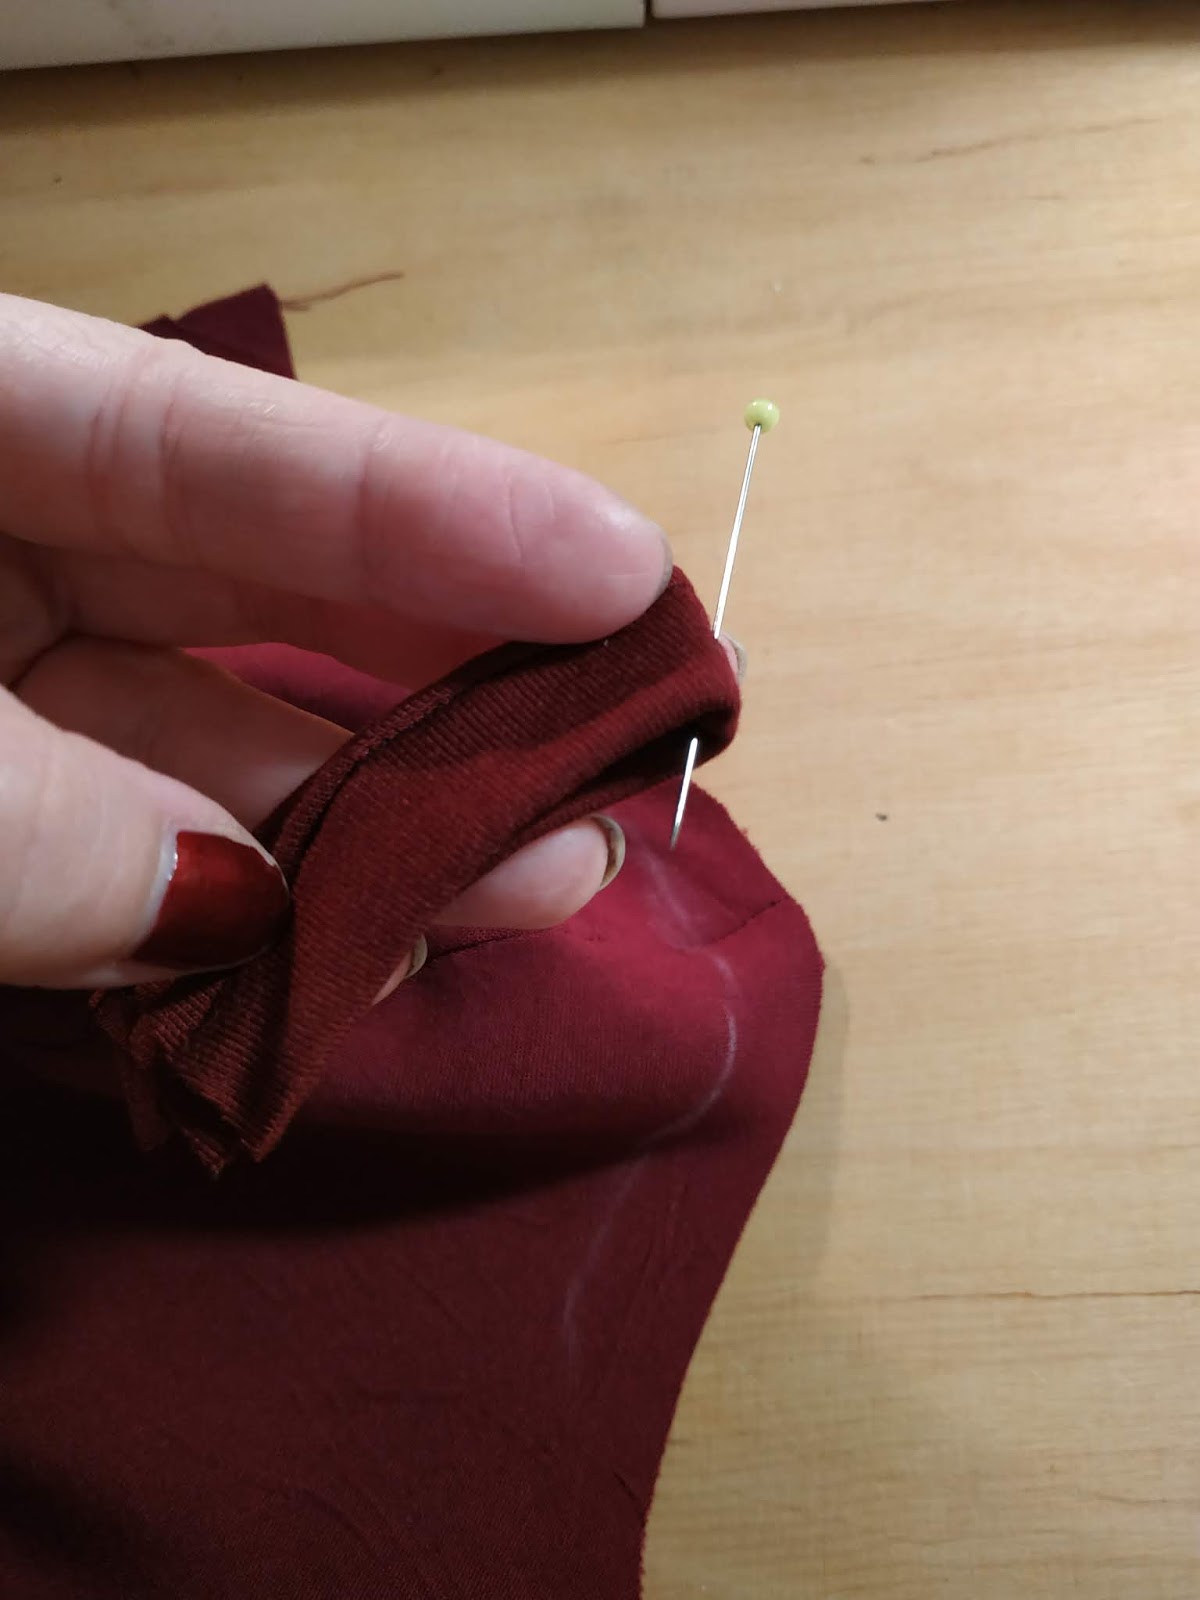
| Now we are going to insert the wire into the seam we just sewed. If you forgot to prepare it beforehand click here. Position it inbetween the seam allowances (see how I pushed the lower seam allowance down and pushed the upper seam allowance up. We do that to make sure that the wire can't poke through on either side. I sewed three tiny stitches through the fabric tape, the seam allowance and the outer fabric to secure it in place. I used contrasting thread to make visibility better for the foto. In reality I would recommend matching thread. That way you can just leave the stitches in when you are done topstitching. |
 |
| Put a few pins in to hold the fabric in place around the wire |
 |
| Be careful that you don't catch the nose pad in back. Make sure you fold it out of the way. |
 |
For the next step you will need a zipper foot! It will make sure that you can't sew into the wire, which would result in the sewing needle braking (and potentially sharp metal pieces flying into your face). It you choose to ignore me on this make sure you at least wear glasses! I have for real learned this the hard way. Don't be like me.
Now for the actual sewing part: You will sew from the the right side of the outer fabric. That way the outside will look pretty and neat.
Start sewing about 1cm before the wire starts (you can feel where it is with your fingers) - our aim is to form a relatively tight pouch for the wire. So start close to the edge of the fabric about 1 cm before the wire comes along, curve outwards and then just go closely along the wire. Once you reach the end of the wire you curve back towards the edge and continue topstitching. |
 |
| You can see how easy the zipper foot makes this job! When you come close to the apex of the curve just go slowly and you shouldn't have any problems going around the curve. |
 |
| You can see the end of the wire where my finger is. From that point you just go back to the edge. |
 |
| As you can see here I continued the topstitching down the sides (you don't have to do that I just wanted to know if it looked better). As we are starting our topstitching shortly before the wire and not at the side -to make sure that the wire can't move out of position before we have the chance to sew it - you have to topstitch the gap between the side and the wire now. |
 |
| The next step is to iron up both the outer fabric and the lining fabric by 1 cm |
 |
| Then topstich the two layers together |
 |
| Your mask will look like this now. See that I folded the sides over by a little bit and sewed them down? You can do that too, but you don't have to. Just folding it over and ironing it in place will work too. |
 |
| The next step is to fold the edges over again. Make sure that the fold you just made doesn't overlap the lining fabric, we are want to be able to insert a desposable filter into this mask so we have to keep it open at the sides. |
 |
| Next we will sew down the flaps we just ironed in place. Make sure that you sew right at the edge so that you have enough space to insert your elastic later. Also make sure that you hold the lining fabric back so that you don't accidentally catch it while sewing. |
 |
Congratulations! You are done!
I'm each and every time surprised how obscene these masks look on pictures :D I promise they don't look that way in real life!! |
You are ready to insert your choice of closure now! Click here for 4 different options.
If you want care instructions click here.


Comments
Post a Comment