Why would you want an upgrade to a surgical mask?
Surgical masks are mostly meant to protect the patient against germs not the wearer! Ideally all medical professionals (or actually basically everybody in close contact with potentially sick people. Cashiers, pharmacists, etc) would constantly wear a FFP2 or FFP3 mask. I don't know how the situation in your country is at the moment, but there might not be enough FFP masks for everybody.
So the next best thing is a surgical mask! (if you want to know why click here) The problem with surgical masks is that they are not as fitted as you would want. This mask cover should solve that problem (I'm not claiming this is perfect or in any way an equal to an FFP mask, but in certain situations it's as good as it's going to get). Let's hope that we make a sh*t ton of them and never use a single one, but lets also not count on it.
A thought on fabric colour: When you are making mask covers for (medical) professionals you should keep a few practical things in mind. Firstly, the mask must be washed after every use (and they will be washed very hot and very frequently) - so colours will probably fade really fast and look unprofessional. White can be bleached, which might be necessary. My mom is a nurse and asked me to make a few masks for her, which is why I fotographed the one I made for her, even though white on white is not as easy to see. Sorry about that!
What you will need:
- Tightly woven cotton (min 20x35cm)
- Viscose (min 20x35cm) or something similarly soft
- Jersey (=T-shirt material) (min 6x10cm)All the fabric needs to be prewashed before cutting out! Use the highest setting your washing machine will allow, just to make sure that the fabric shrinks before sewing it up
- super light iron on interfacing optional - just for easier sewing and pretty results
- Rotary Cutter or fabric shears
- Iron
- Print out PDF Pattern. Print at 100%, don't scale it to your paper size!!!
You will need these two pattern pieces:
 |
| Cut out 2 pieces of your outer fabric (the strawberry fabric is just for illustrative purposes - I used white cotton for this mask) |
 |
| Now cut the pattern piece at the dotted line - this will be your lining piece (if you want to use the outer fabric piece again later feel free to just fold it back instead of cutting it off). |
 |
| Cut out 2 pieces of your lining, if you choose to use fusible interfacing cut out 2 pieces as well |
Check that you have assembled everything:
 |
left: Iron on interfacing (optional), top: viscose lining, bottom: cotton outer fabric, middle: jersey rectangle
Be sure to cut out the pieces in pairs! |
Iron the interfacing pieces to the wrong side of the lining fabric. Check that the side with the glue (the side that is a bit rougher usually) is against your fabric and not your iron, otherwise you will have a sticky mess.
While you are ironing anyway, prepare the nose pad as follows:
 |
| You should start with a 10x6cm rectangle |
 |
| Iron it in half to form a crease in the middle |
 |
| Unfold and fold the top and bottom edge towards the middle |
 |
| Fold the whole thing along the middle to encase the raw edges |
 |
| Now that you have everything prepared we will start sewing. Pin the outer fabric and the lining with wrong sides together. (when you are looking at it: for the lining that means that the interfacing is on the outside). Sew with a 1 cm seam allowance along the curve (the convex one on the left) on both lining and fabric. Baste the nose pad along the length. |
 |
| Here is where the seam lines should be (sorry that it's a bit hard to see). |
 |
| Snip into the curves to make turning and ironing easier |
 |
| Make sure that you come close to the line of stitching but don't cut through it |
 |
| Iron your seams open. On both your lining and outer fabric. |
 |
| Snip the little corners at the top off to make the next steps easier |
 |
| On the right side of your lining fabric: Mark 1cm from the top with eraseable pen or chalk |
 |
| Mark your seamline along the middle third like so |
 |
| Fold your nose pad in half to mark where the middle is |
 |
| Pin along the line that you just drew |
 |
| Stitch in Place. Go in a ] shape - start about halfway down the short side (you need to fold it a little bit out of the way later on), go along the long side and go halfway up the other short side again. |
 |
| When you reach the seam in the middle, put your needle down and lift your presser foot a bit to pivot, then go down the other side |
 |
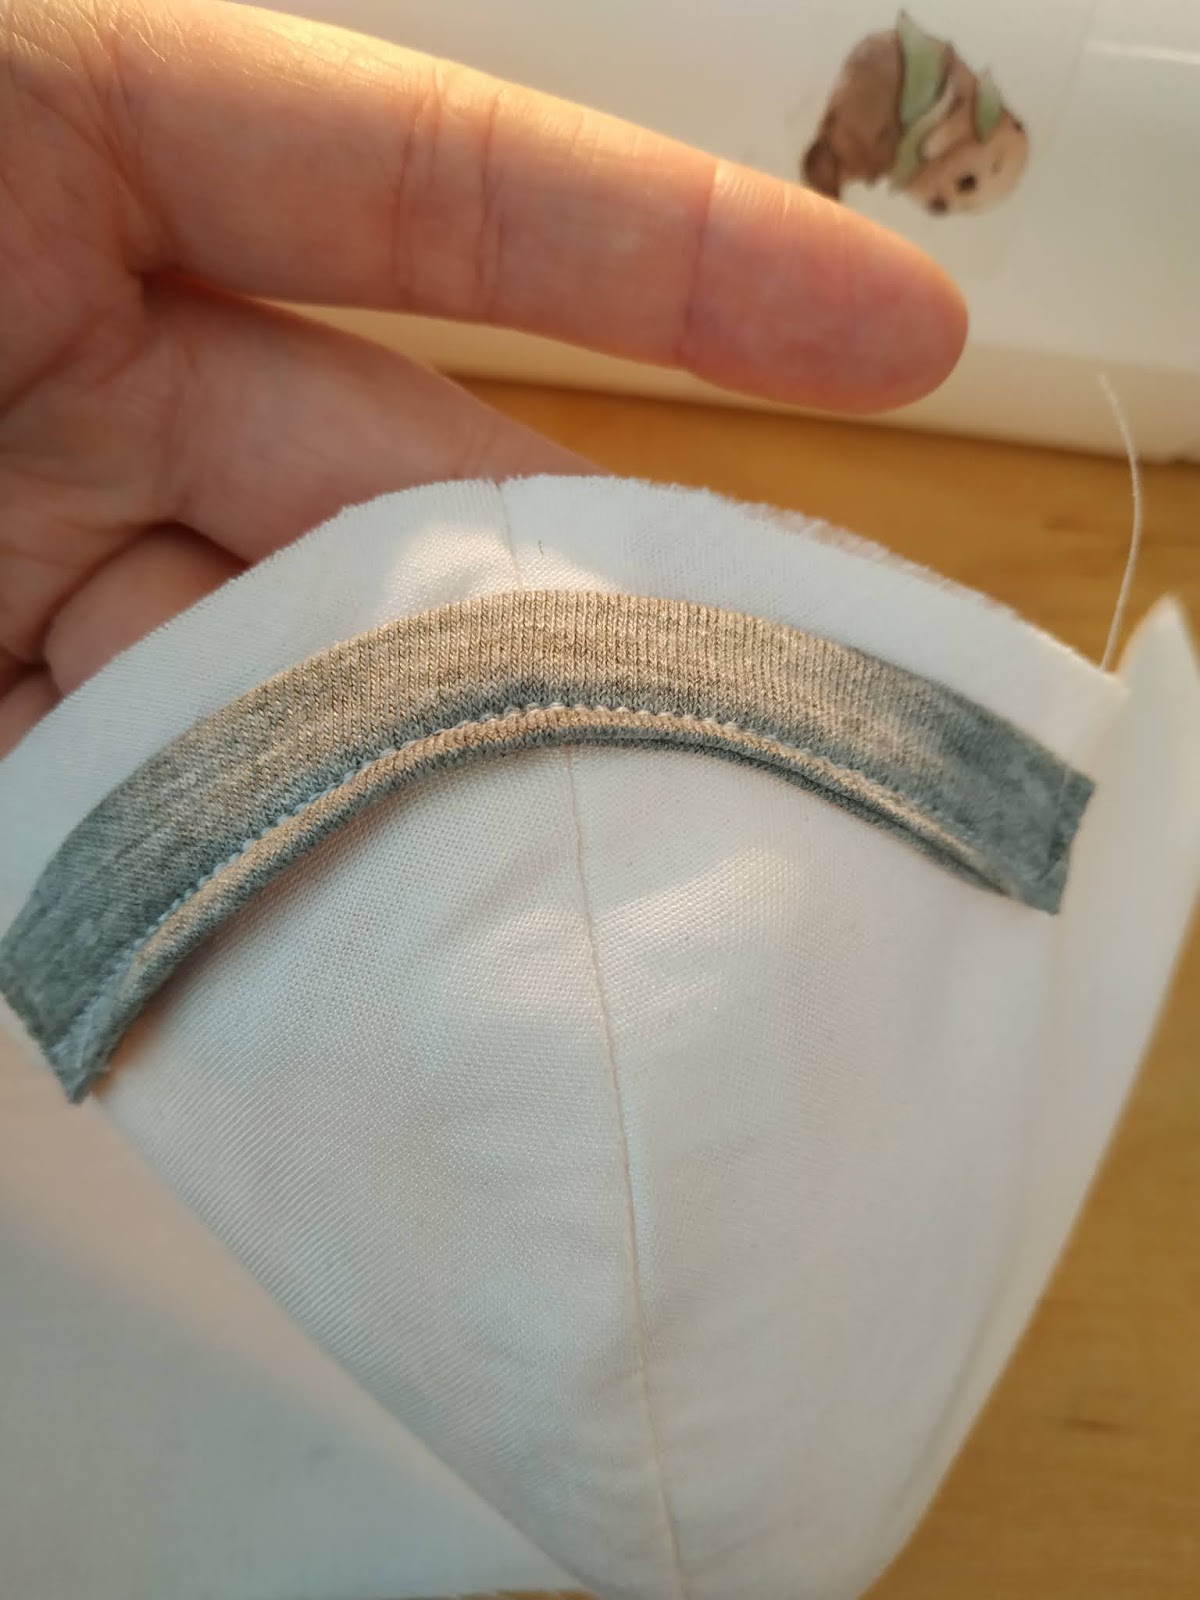
| That's how it should look afterwards |
 |
| Take your lining piece to the ironing board an fold it over by ~7mm. Iron |
 |
| Fold over a second time and repeat for the other side |
 |
| Fold the fabric to the inside on the outer fabric as well, but make sure that it's just ~ 3mm and fold it over just once. We are just trying to make a tiny fold to topstitch down. |
 |
| Top stitch the folds down on both lining and outer fabric. Make sure that you stitch close to the edge (in this case on the left). |
 |
| When you are done it should look like this |
 |
| With right sides together (the pretty sides should face each other) pin the top and bottom but be careful to fold the nose pad out of the way (check the next image for clarification if you are confused about what I mean) |
 |
| Here you can see the shadow of the pushed back nose pad, the seam line of were you attached it and the seamline that you just made |
 |
| Turn it inside out. It will look a bit strange and wobbly and not at all like a mask. Commence the ironing magic. |
 |
| When you are ironing try to roll the ling to the inside. you will see about 1 mm of the outer fabric on the top. It makes for a pretty and neat outside. Please excuse the manicure, the apocalypse has got me overwhelmed :D |
 |
| Look how neat the top edge (right) looks in comparison to the bottom (left). Repeat the process for the bottom edge! |
 |
| Fold the outer fabric towards the lining. DO NOT overlap! |
 |
| Be carful that the pouch to insert the surgical mask stays open. Topstitch close to the edge (where my pins are in this picture) - this will create the chanel for your closure method of choice. |
 |
| Congratulations you are done! You are allowed a quiet giggle at how similar to speedos it looks ;D |
Now to finish the mask off in style you need to add some elastic or ribbon. Click here to see 4 different options.
To see how you should wash your mask click here.


Comments
Post a Comment