Why you would choose this one:
This is basically as good as it's going to get in terms of fully home made masks (if you don't have acess to FFP or surgical masks that is).
Please the scientific basis for these masks here.
Benefits:
- Actual filter material inside (scientific research on vacuum filters being able to filter viruses [here]). And why we don't use the filter on it's own [here].
- The filter stays securely in place and can't slide around like a seperate filter could
- Washable -> I actually checked to make sure that the filter can withhold being submerged in water for a long time (>12h) without disintegrating. I also boiled it in water to make sure that it won't melt or change it's structure. Your washing machine will neither be as hot nor as draged out as my experiments. So you should be good.
- Reusable (after washing obviously)
You will need:
- Tightly woven cotton (20x35cm)
- Viscose (20x35cm) or something similarly soft
- Jersey (=T-shirt material) (6x10cm)
All the fabric needs to be prewashed before cutting out! Use the highest setting your washing machine will allow, just to make sure that the fabric shrinks before sewing it up
- 1 Vacuum cleaner bag
- Rotary Cutter or fabric shears
- Pins
- Marking tools
- Wire
- Wire cutter
- Fabric Tape
- Zipper foot
- Iron
- Print out of the PDF Pattern. Print at 100%, don't scale it to your paper size!!!
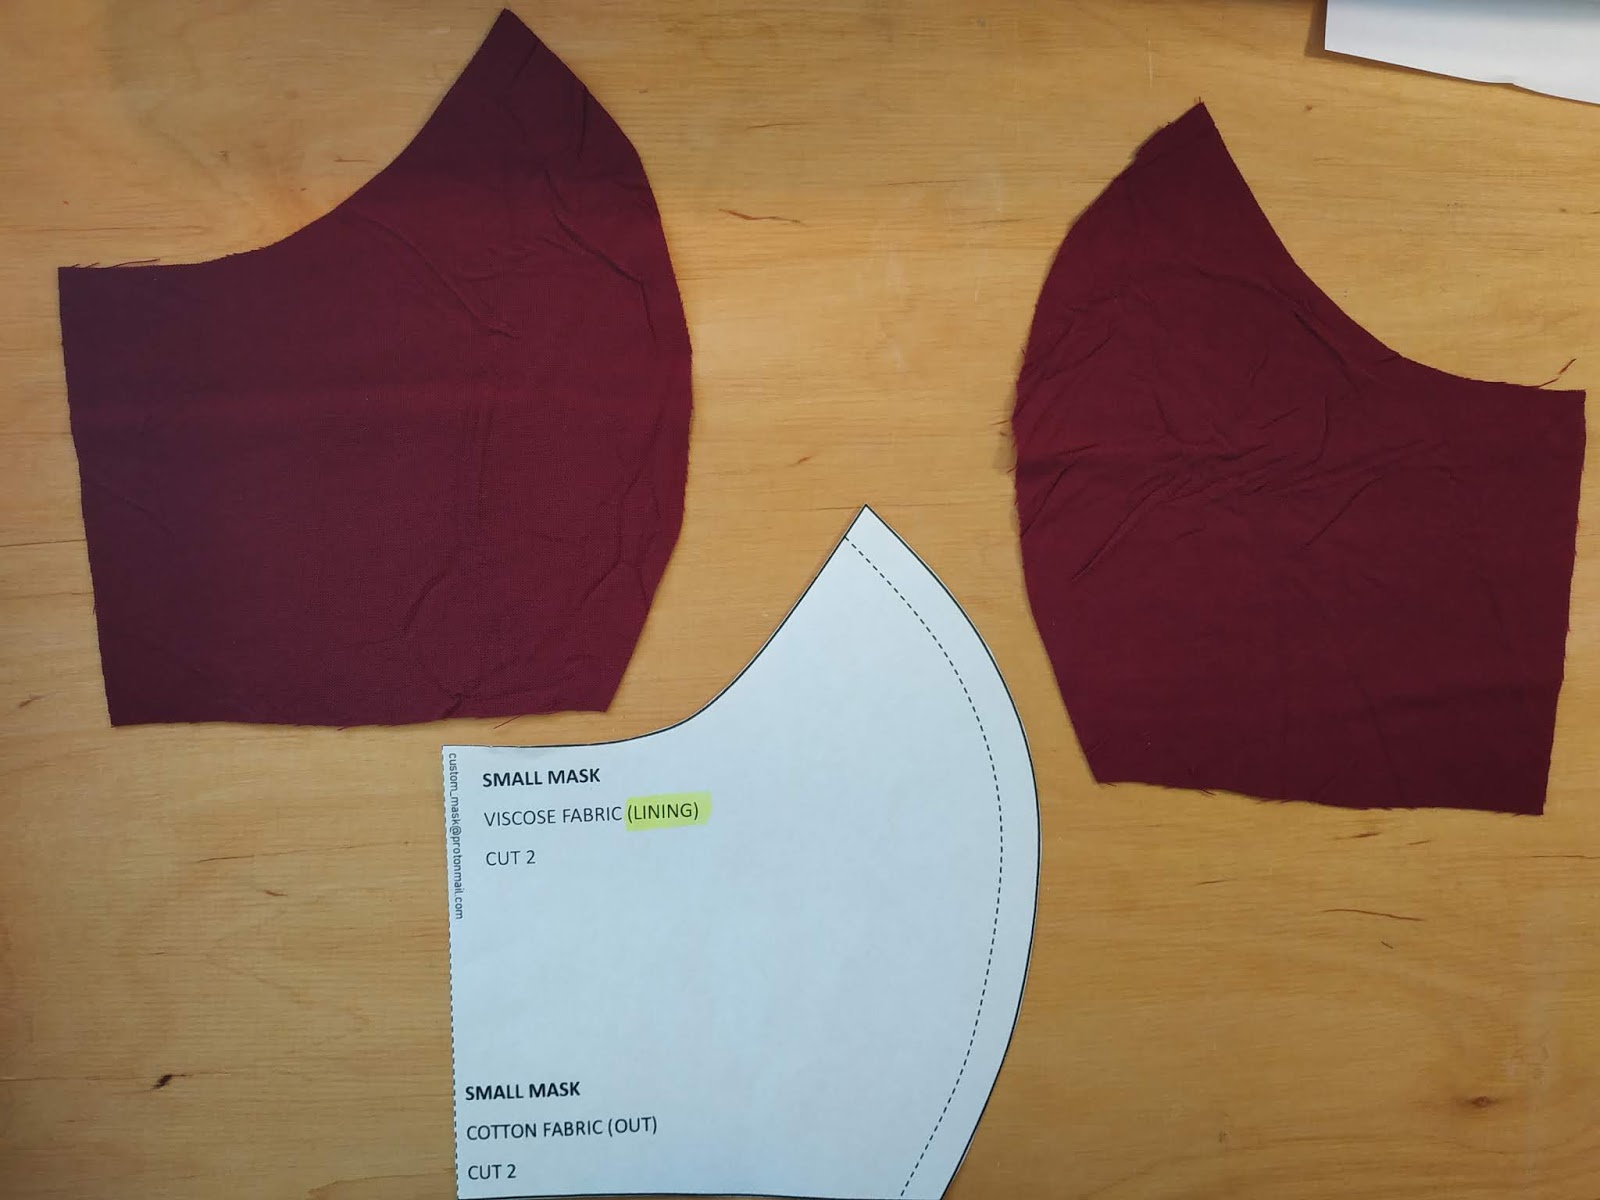
You will need these four pattern pieces:
 |
| Cut two pieces from your outer fabric |
 |
| Now cut off the pattern piece at this dotted line this will be your lining piece. (if you plan to make more masks feel free to just fold it over instead of cutting it off) |
 |
| Cut 2 Pieces of your lining fabric of choice |
 |
| Cut 1 nose pad |
 |
| Get your vacuum bag, cutting tool of choice and your pattern piece ready |
Just a quick reminder your filter piece is different from your lining piece!
 |
| I folded the plastic out of the way to make cutting easier. |
 |
| Here is how the pieces should look now |
Check if you have everything assembled:
 |
| Clockwise: Filter, Wire , cotton popeline (outside), viscose challis (lining), jersey (nose pad) |
Step 0: Prepare nose pad [click] and wire [click]
Step 1: Sew your filter first to get that out of the way. Please remember the filter is sewn with a 5 mm seam allowance! (everywhere else there is a 1 cm seam allowance)
 |
| Avoid poking unneccessary holes into your filter! I put one pin into the seam allowance at the bottom to avoid the pieces moving apart while I start sewing from the top. The material is not slippery, so it won't be hard to sew even without pinning |
 |
| another reminder :) |
 |
| just reiterate again that the lining piece is smaller than the outer fabric :) |
 |
| Pin the fabrics together with the wrong sides facing each other |
 |
| Pin both outer fabric and lining |
 |
| Sew with a 1 cm seam allowance (bonus otters to cheer you up ;) ) |
 |
| Clip the curves to make ironing easier. Be carful that you clip close to but not through your line of stitching |
 |
| Iron your seams open. A tailors ham will make that easier, but is not essential! You can roll up a towel to mimic the effect :) |
 |
| this is what we are aiming for |
 |
| That is what it should look like from the outside, repeat the whole process for the lining |
 |
| Trim the floppy bits |
 |
| fold over once (by ~7mm) and iron in place |
 |
| fold over a second time and iron in place |
Short interlude in a different colour :) to explain how to install the nose pad (which is the actual next step to take)
 |
| Mark a line 1 cm away from the top edge of your lining piece. This is on the right side of your fabric (that means the side where you dont see the seam that you ironed open) |
 |
| Fold your nose pad in half and mark the middle with a pin |
 |
| Pin the nose pad to your fabric below the line that you drew |
 |
| See how the chalk line and the top of the nose pad meet? Sew in place |
 |
| Your lining piece will look like this |
Back to the roses :D
 |
| Pin the outer fabric and lining pieces with right sides together along the top edge (that is the one that is more curved), make sure to fold the nosepad out of the way (better picture coming up 1 below |
 |
| Make sure that you actually pin them with right sides together! (that means that when you flip it over you should see the seam that you just ironed on the outside) |
 |
| You can see the line of stitching from the nose pad, the shadow of the pushed down nose pad, and the line of stitching that you just sewed above that |
 |
| It should look a bit like this now. Turn it inside out |
 |
| To make the edges as pretty and neat as possible, pull the lining a bit to the inside when ironing. When you see about 1 mm of the outside fabric it's just right. Note that, because you are not like me you didn't forget to install the nose pad - so on your mask there will be a nose pad there as well. |
 |
| Note that the bottom edge is left open on purpose! Don't close it up |
Next we will prepare our filter:
 |
| If you haven't already sew your filter pieces together with a 5mm seam allowance |
 |
| Clip into the curve, AGAIN make sure not to cut through your stitches |
 |
| Push the seam open with your fingers, DO NOT iron! It will melt and stick to your iron :(. Fun times I promis you |
 |
| Now to install the wire: stick your needle all the way through the tape and the filter medium, then come back inside. Once again through both the filter and the tape. Leave yourself enough length of thrread to tie a knot (this stitch is not meant to hold up over time, we will encase the wire in a seam later on which will hold it in place for good. These fast little knots are just to make sure that it stays in place while we are sewing) |
 |
| The knot doesnt have to especially strong or neat, just functional |
 |
| Repeat for the tape at the ends. We are ready to install the filter now. |
 |
| Flip your two pieces open. This is where we will install the filter. |
 |
| Place the filter right underneath the seam line. Note how all the down the middle match up! That tells you that you have the right position |
 |
| Line up the mask just beneath the seam line all the way across |
 |
| As the right position of the wire on the nose is crucial I put 3 little temporary stitches above the tape (lime green thread so you can see). Make sure that you sew only through the filter and the outside layer of fabric (rose print). Note how the filter lines up to the seam line (orange stitches)! Fold both layers of fabric over the filter, we are going to topstitch from the outside! |
 |
| If you look closely you can see the tiny stitch on the outside that I made to secure the filter (lime green stitch on the rose petal between my fingers) |
Important note:
There is no need to pin the filter in place -> avoiding unnecessary holes (especially ones you won't close up with thread), if you have ironed the top edge as shown before and nestled the filter in that crease it won't move around
Super important note: Change your presser foot to a zipper foot!!! I tried to manouver with a regular presser foot, sewed into the wire and had needle fragments flying into my face. Fortunately I wore my glasses.. Please don't be as dumb as me (and if you choose to ignore me at least wear glasses to protect your eyes)


Comments
Post a Comment